No title

LOOK!

P1010588

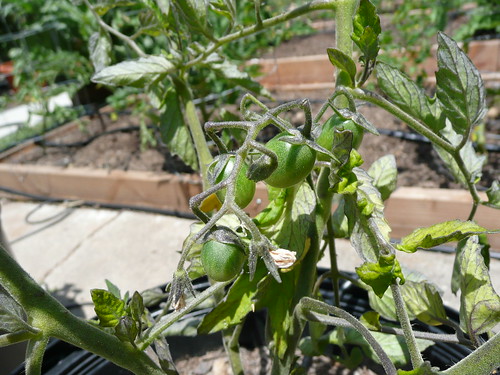
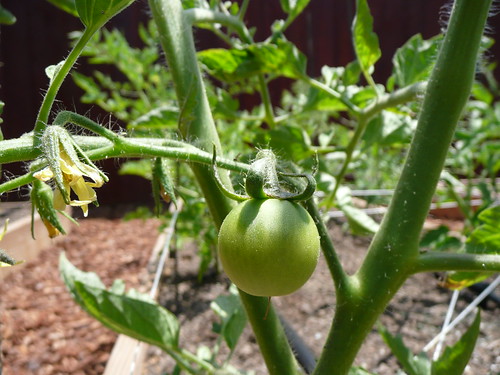
Tomatoes! (even on plants that have gotten a wee bit sick — see the purple tint to the stem and leaves? Bummer.)

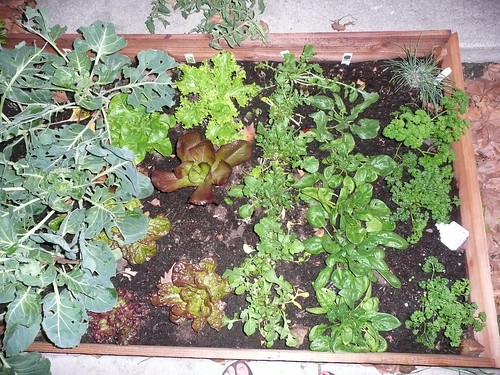
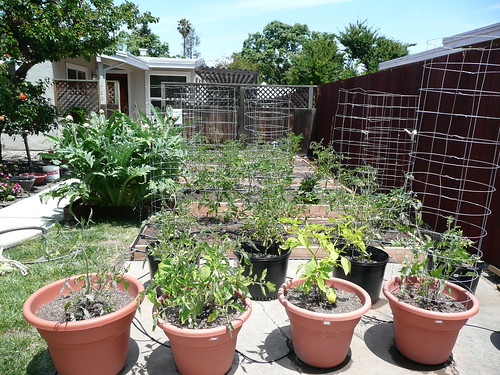
The garden has grown quite a bit (and ideally, will grow much faster now that I fertilized with fish/kelp emulsion ’cause my plants were just not as green as most of my friends’ plants…).

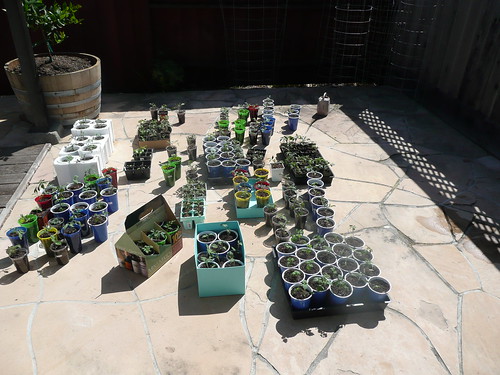
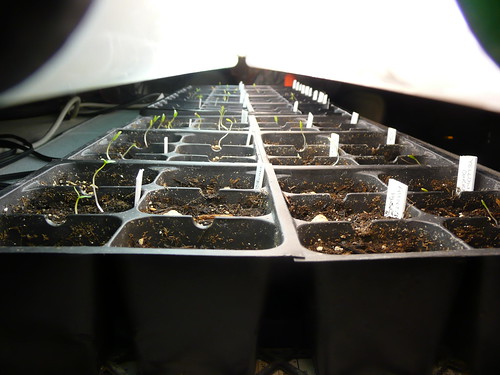
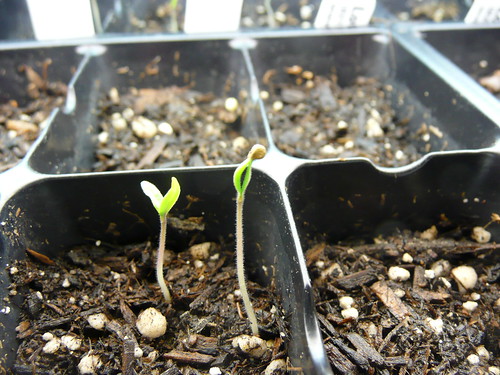
As you may recall, it started out like this:

P1010290

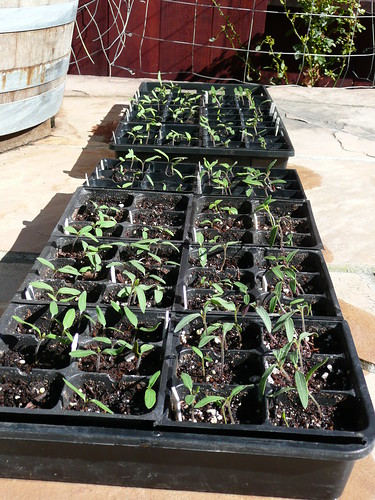
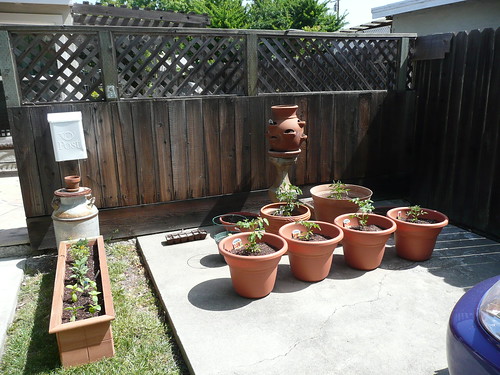
A month later, it looked like this:

garden_May2009

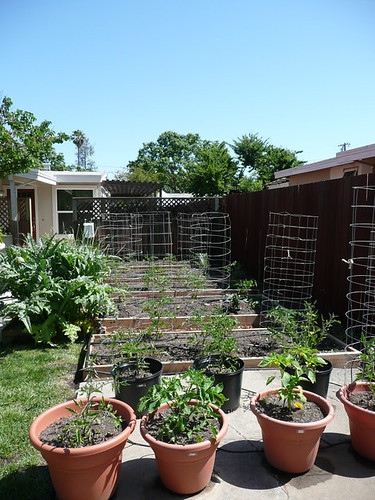
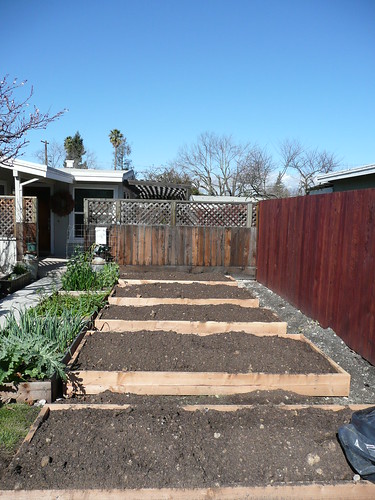
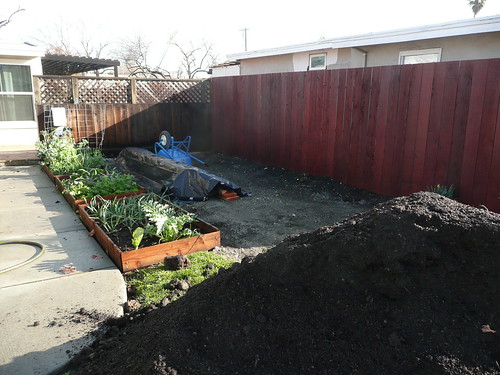
And now, 2 weeks later, we’ve got this:

P1010585

The biggest tomato so far is a little 1 inch diameter fruit, hanging off of Brandywine Red Lantis (I have no idea what the Lantis stands for, that’s just what Cynthia called it):

P1010590

And much to my surprise, the most prolific fruit producer, in terms of total mass so far has been White Oxheart. Weird. I would have thought some of the earlier maturing varieties would be kicking its butt at this stage.

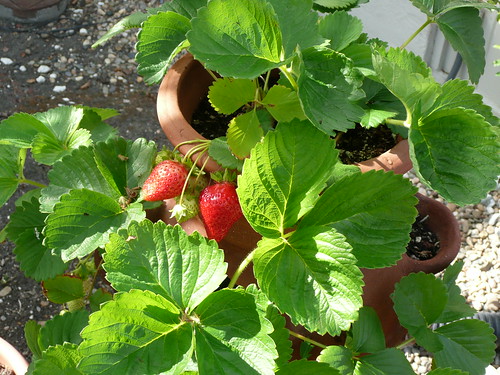
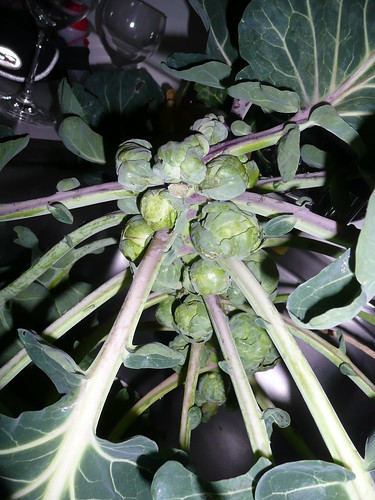
In the meantime, while we salivate over the future tomatoes, we get to enjoy good stuff while we wait:

P1010593

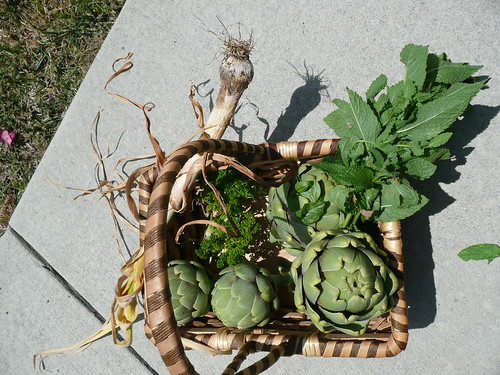
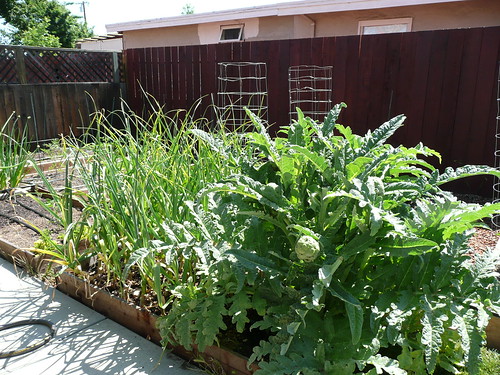
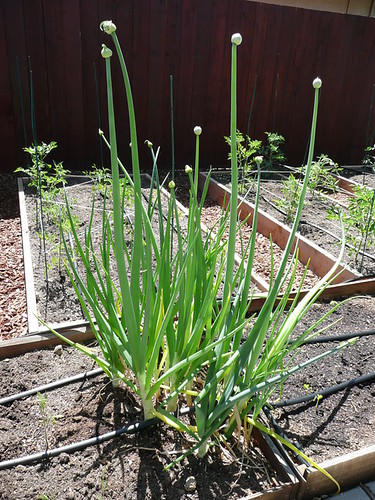
The fruits of the ridiculously prolific artichoke plant, the mint (which we transplanted out of the raised beds because it was taking over and threatening Gold Nugget), baby basil leaves, the end of the parseley, and the first garlic to fall over, which has now been hung to dry.

Other than that, the garden is coming along as gardens do. We’ve got aphids. We’ve got some fungus. We’ve got ladybugs, bees, earwigs, and worms. I spent several hours on Sunday fertilizing, pruning, tying tomato plants to stakes, and harvesting. The plants appeared to very much appreciate it in less than 24 hours, which is very gratifying.

G & C gave us a cucumber seedling that is infinitely superior to the one remaining living cuke I’m nursing along (I planted 2, one died). I think, if there’s one thing I learned this year, it’s that seedlings don’t like direct sun until they are a little bigger than the first true leaves. Oh, and that I probably should have watered the seedlings more while they were small. So I’ll be planting that cucumber and taking out a couple of squash plants to give to them in return.

Finally, I made a Worm Castings Tea and plan to spray tomorrow in the hopes that it will help ward of pests and encourage additional growth.

Oh, and E (with the help of C) built me a new compost box in the back yard. Our plastic bin is completely full of black gold. I turned it and watered it on Sunday and found that the only identifiable matter were some egg shell pieces. The rest was just dark, almost tar-colored, soft dirt-like soil. I can’t wait to use it for the winter garden! Finally, after 3 years of composting…

Because the bin is full, we’ve been donating our kitchen scraps to the city compost, but I wanted to save them and use them in the soil. Thankfully, E & C were in a handy mood after the afternoon at the Maker Faire. So now we have a new two-cell compost bin made of pressure-treated wood. Yay!

In short, the gardening hobby grows. Literally. And we’re having much fun.

No title

Better Late than Never

E sent me the adorable story of Shizo Kanakuri, who dropped out of the 1912 summer Olympics marathon only to finish it later. Much later. Like 54 years, 8 months, 6 days, 8 hours, and 32 minutes and 20.3 seconds later.

Also, our garden keeps growing:

garden_May2009

All of the summer plants are still alive. Although, if I am honest, I will admit that I fear I may lose Green Giant, and Japanese Black Trifele who are not perfect, and may be sick. But the rest appear to be fine.

And, since we planted 34 total varieties, I think we’ll be okay.

In other news, the theory that artichoke plants from seeds do not produce until the second or third year is crazy. Check it out:

garden_may2009_garlic

That artichoke plant? It’s a single plant. It’s 4 feet tall. It’s given us 2 huge artichokes, 2 smaller ones, 1 more huge and is incubating 3-7 medium sized chokes.

Plus, those huge 4-foot tall grass-looking things to the left? That’s garlic. Garlic we planted back in October.

And, as if the freakish huge garlic wasn’t enough, the onions have started to send up “flower stalks” or “seed stalks” which is ordinarily something that happens after 2 years, but for me, no. We’ve got 4 foot tall seed stalks on onions that haven’t even been harvested after 1 year:

may_2009_onions

So, yeah. That’s the garden.

Also, given the increasing size of the tomatoes, cucumbers, squash, onions, garlic, eggplants, etc. We discontinued the CSA. E gave a cheer when I announced the last delivery. I’m not sure if that’s a good thing…

No title

The Garden Grows

Literally. Exponentially. I think we may have planted a wee bit too much for this Summer, but there’s no way to know ’til it’s too late:

P1010290

That would be:

32 tomato plants
2 husk tomato plants
4 pepper plants (2 squash peppers, 1 jalapeno, 1 spanish pepper of medium heat)
1 japanese eggplant
1 japanese cucumber
1 american space-saver cucumber
1 bok choy plant
1 mustard plant
2 butter lettuce plants
1 green/red lettuce plant
1 red lettuce plant
42 garlic stalks
1 artichoke plant
20-30 onions/leeks (or so) from the winter planting
100 onions/leeks from the spring planting (still waiting to be thinned)
1 mint plant
3 cilantro seedlings
1 rosemary plant
1 lemon thyme plant
1 greek oregano plant
1 marjoram plant
3 parsley plants
1 italian parsley plant
AND
1 strawberry planter full of delicious strawberries (seriously, they were even better than the CSA strawberries, which were wonderful!)

P1010284

Plus seeds we are hoping will sprout of:
-okra
-nasturtium
-marigolds
-borage
-cress
-English thyme
-chives
-dill
-acorn squash
-butternut squash
-summer squash
-green summer italian squash (not zucchini, smaller and lighter green, more tender)

Not to mention the basil I haven’t transplanted yet…and a few unaccounted for spaces where I’m likely to plant even more seeds.

I think I may have a problem. Thank goodness that E and friends will be setting up the drip irrigation system this weekend. This is really starting to be too much to manage by hand.

Finally, before we say our complete goodbye to the winter garden, we should be thankful for the broccoli, cauliflower, sugar snap peas, arugula (!!), chard, cabbage, beets, radishes, and carrots. The last 2 categories were the last to be picked to clear the way for the Summer garden. We were impressed that the carrots dug below the top soil and deep into the clay:

P1010283

Simple Carrot Dill Bisque

Tonight, we used the roots in the picture above to make a carrot dill soup.

1. Sautee the tops of leeks and any sliced radishes, with garlic and chopped baby carrots from the CSA (along with chopped pieces of our mature carrots) in olive oil;

2. Add salt, pepper, water and simmer until carrots break easily with a spoon. Add milk to taste and puree with a hand blender;

3. When you have the consistency you like, add chopped dill, stir until fragrant and serve immediately.

Wish us luck for a summer full of good harvests and creative recipes!

No title

You see what happens?

Baby Tomatoes, if cared for, will grow into adolescent tomatoes.

Saturday, a tomato-lovin’ friend came over (thanks J!) and we potted up our 219 tomatoes of 34 varieties (including 2 husk tomatoes).

It’s a fairly time intensive task, but I find it very relaxing.

First, you separate the plants from each other (because their roots have grown together as they’ve outgrown the tiny cell where they were planted):

P1010270

Then, you dig a small hole in the cup of dirt, add a tiny bit of tomato plant food, drop the roots into the hole and add potting soil to fill up the rest of the cup. If possible, it’s best to bury the stem with dirt up past the seed leaves, and if you want, you can even remove them if the plant has enough true leaves.

At the end of the day, we had a front yard full of plants:

P1010273

Anyone need a tomato seedling or 10?

No title

Planning the Tomato Madness

Today, we had several big garden milestones.

First, day 13 after potting, we finally got one sprout of Aunt Molly’s Husk, the last of the 35 varieties to sprout. Somehow, we managed to germinate at least one seedling of every variety we tried to grow (keeping the seedlings alive, of course, is another matter, but still).

Technically, Aunt Molly’s Husk is a husk tomato or ground cherry (like a tomatillo, which we are also growing), so it’s not a true tomato, but once we were growing 33 varieties of tomatoes, given that the cheery tomato seeds I ordered over the internet came with tomatillo seeds and Aunt Molly’s Husk seeds, well… who are we to resist? Salsa verde, here we come!

Second, the tomato seedlings were allowed outside for their first exposure to the real world today. It was only 2 hours, but they seemed to like it and rewarded us with 8 new sprouts between last night and tonight.

P1010230

Third, at tonight’s 13-day post seed-potting count, we are at 199/257 seedlings sprouted, for a germination rate of 77.43%.

Fourth, and finally, we got the busted concrete debris removed, cleaned up a bit of the winter garden, purchased some redwood bark for the walkways between the garden, and started the final transition to this year’s garden madness, aka The First Summer of Tomato Madness.

P1010232

And yes, in case you were wondering, that is a very dead Christmas wreath hanging to the right of our front door. Perhaps we’ll take it down tomorrow…

No title

Tomato Seedling Update

Day 8 after potting I am proud to report that we have 60.46% germination!

P1010222

That’s 153/256 tomato seeds (the total is an estimate — you shoot to put 3 seeds in each cell, but if you accidentally drop one, you only find out when your yield is > 100%).

I am excited to see what the final germination rate is — in the last 24 hours we got 28 new sprouts, and I can only hope for a similar increase tomorrow between day 8 and day 9.

No title

Our Babies

Well, as I said, E and I are committed to the garden this year.

And, I’m a tomato-lovin’ fool.

So, I’m trying to grow several varieties of tomatoes from seeds.

Basically, I’ve got a *grow room* in our garage:

P1010208

And, it’s so cool.

When they first sprout, they look like this:

P1010211

And, then, less than 24 hours later, after exposure to the one cool flourescent and one warm flourescent bulb, they look like this:

P1010212

In the interests of safety in numbers, I planted roughly 250 seeds of somewhere in the neighborhood of 35 breeds of tomatoes and tomatillos. Even with the new construction, this summer, we have space for maybe 20 plants of this type if we want to have a summer garden with vegetables of any other type. It should be interesting to see how this plays out…

No title

The Garden To Come

E & I are committed.

Remember last year’s beginning to the garden adventure? It looked something like this (before my co-worker contributed additional plants to the fun and we converted the entire grass strip to raised garden beds)?

P1000735

Well, brother and his boss showed up this weekend to get rid of half of the RV parking lot on our property (seeing as how we don’t have an RV). After hours of jackhammering, they finally called it a day and left a big ‘ole dirt area, plus some prime soil to be put into the boxes they’ll be building next weekend:

P1010204

We are so excited for this summer’s garden!

No title

I take back *everything* I ever said about the winter garden

Tonight, E became an official winter garden supporter, when he stated the phrase above.

Until now, he’s been conflicted. It’s nice to have a garden year round, and it’s a fun hobby, plus, it keeps me less stressed, and it provides us with some nice additions to meals. But, at the end of the day, it’s mainly dark green leafy things, which, frankly, if you ask him, suck, compared to the glorious harvests of summer.

That is, the winter garden sucked until tonight.

Silly me, I waited ’til now to apply pork to the situation. What was I thinking? Pork makes everything better!

Herbed Pork Chops over Brussel Sprouts and Red Onions

-2 large pork chops, washed and dried
-2 sprigs fresh marjoram, leaves removed from the stem
-1 large sprig fresh rosemary, needles removed from the stem
-2 sprigs lemon thyme, leaves removed from the stem
-1 red onion, sliced into 1 cm rounds and chopped into quarters or sixths
-2-3 T olive oil
-1/2 meyer lemon, in quarters, seeds removed, ready for squeezing
-black pepper
-sea salt
-2 T pickled horseradish purée
-and, of course, from the winter garden, 1 stem of fresh brussel sprouts

P1010153

1. Pre-heat oven to 400F. Wash and Prep vegetables. Remove all brussel sprouts from the stem, wash thoroughly, cut the stem-ends from the sprouts so that they have a flat end to set in the baking dish. (NOTE: If you are using a 9X13 Pyrex dish, remember to keep it fully on the counter while chopping brussel sprouts on the cutting board. Otherwise, it will weigh the cutting board down, on the portion of the cutting board that is not on the counter, and you will have many shards of pyrex to clean up…you could even lose a few brussel sprouts that had been placed in the dish…theoretically speaking.)

2. Layer onions and brussel sprouts (chopped stem flat-side down) into a baking dish.

3. Mince herbs. Mix with olive oil, salt, pepper, and horseradish. Sprinkle 1/2 the mixture over brussel sprouts and onions in the baking dish.

4. Wash and dry pork chops. Spoon mixture on all sides of pork chops and layer on top of vegetables. It should look more or less like this:

P1010154

5. Place into pre-heated 400F oven for 10 minutes. At the 10 minute bell, remove the dish and flip the pork chops (they should be white on the side you put down and slightly pink on the side you put to the top). Squeeze 1 lemon wedge over the chops and vegetables. Return the dish to the oven and turn heat up to 500F, and set the timer for 10 minutes.

6. At the timer, check the dish. Turn the pork chops one final time. Squeeze the other lemon over the non-lemon-flavored side for another 5 minutes of heat.

7. Remove from the oven. Arrange on two plates, and allow it to sit for 5 minutes before eating a delicious meal (which could look something like this):

P1010155

8. Enjoy! (And enjoy the validation of the winter garden because these truly are the best brussel sprouts you’ve ever had in your life!)

No title

Garden Lebanese CousCous

Our 6 arugula plants had generated an impressive amount of regrowth after the harvest for halloween dinner party salads. So, last night, I trimmed again:

P1010013

The salad section of the garden looked much neater after their trimming (the arugula is to the left of the spinach and to the right of the lettuce, so you can imagine how crowded things were prior to harvest):

P1010014

We’re home this weekend, so in the interests of making them even neater, I think I’m going to transplant the lettuces in the left row to where the radishes used to be. The brussel sprouts appear to be claiming that section.

Once I had all of the arugula cleaned, I had to come up with a use for it. So, I present last night’s healthy and yummy dinner (it wasn’t a hit with E, just “okay” he said, but I loved it.)

Garden Lebanese Cous Cous

-approx 1 lb arugula trimmed from the garden, washed and broken into bite size pieces and stripped from the stems where they are too broad.
-1/2 cup of parsley trimmed from the garden, washed
-1/2 cup of basil trimmed from the garden, washed
-1 yellow onion, diced finely
-4 cloves garlic, minced
-1 Tbsp red pepper flakes
-3 cups chicken broth
-1 T butter
-olive oil
-1/4 cup sun-dried tomatoes packed in oil
-1 cup Lebanese Cous Cous (much larger than ordinary Cous Cous, the balls are the size of peas, but I’m guessing this recipe would work with ordinary cous cous as well)
-lemon juice to taste

1. Before you prep the vegetables, bring broth and butter to a boil in a pot. Lower to a simmer. Add Cous Cous. Stir. Cover, and allow to cook. Add more broth if it appears to be getting too dry before it’s fully cooked (approx 40 minutes). Remove from heat when cooked through, stir, and allow to cool a bit with the lid off.

2. Prep vegetables. You can chop the parsley and basil together, at the same time.

3. Drizzle some olive oil in a pan over medium heat, add the onions, garlic and red pepper flakes. Stir and sautée until the onions are almost translucent.

4. Add the tomatoes to the pan and break them into smaller pieces with the spoon.

5. Raise the pan’s heat to high. Add the arugula and lemon juice. Stir quickly, sautéing until wilted and the majority of the liquid boils off. Remove from heat.

6. Add the arugula mixture to the Cous Cous pot. Stir. Add the basil and parsely. Stir again.

7. Serve immediately and allow to cool for 5 minutes in the serving bowls.

Enjoy!